Written by Al Caudullo

For as long as video has been around we’ve used transitions to connect two shots or scenes. Standard video transitions are the stitching that holds our stories together. They may be used to take you from one location to another or to indicate a passage of time. It all depends on the story that you’re trying to tell. Sometimes hard cuts, sometimes dissolves. Often times wipes, slides, and other more complicated transitions.
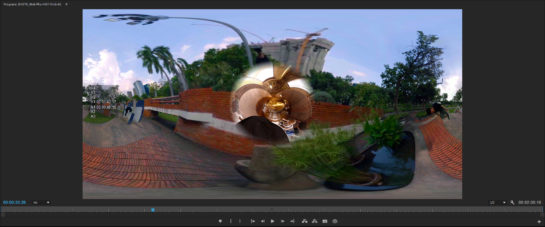
But now with this new medium of 360 videos, we find problems with using our standard tools. In 2D and even 3-D, we have defined boundaries to our frame. But what happens when there are no boundaries. When your video is surrounding you in 360°? Where does the transition begin where does it end?
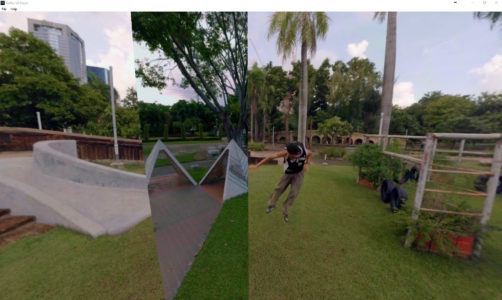
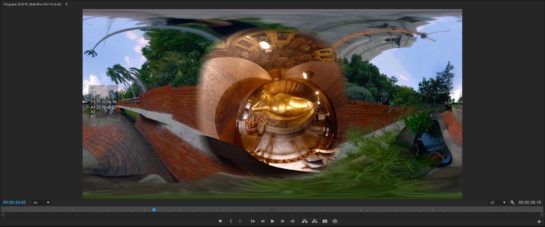
As you can see here, you can get some pretty strange looking lines in the wrong places.
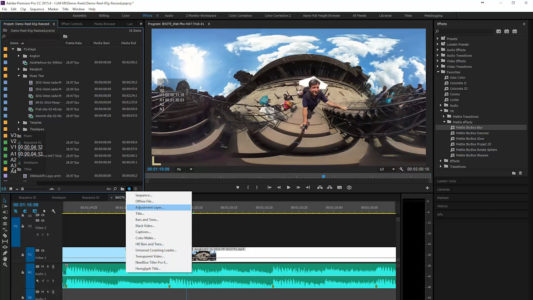
But thanks to our friends at Mettle, we now have the SkyBox Transitions. Initially, we have the Gradient wipe, the Iris Wipe, Random Boxes, and my favorite the Mobius zoom.
In additions, using Mettle SkyBox 360/VR Tools you have two other transitions that you can utilize.
Let’s keep in mind first of all that transitions are part of the creative process. Which transition you use is entirely up to you but should be based on how you’re trying to tell the story. There’s usually more than one transition that will work.
Let’s take a look at how each one works.

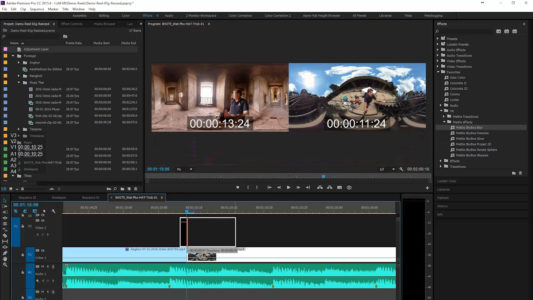
The Iris Wipe
This is one of the most basic wipes. Imitates the iris of a lens by opening a rounded, soft-edged portal in the center of your first shot. It continues expanding until the second shot has completely replaced the first.
Also, if you bring up the transition settings in Premiere, adjustments can be made to the alignment by choosing to center on the cut, start at the cut, end at cut or custom start. Mettle SkyBox also allows you to set your point of interest, the center of the iris and to adjust the feather width.

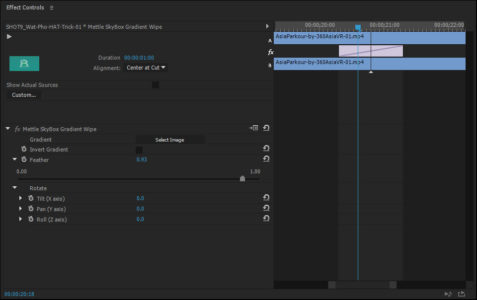
The Gradient Wipe
The next transition that we’re going to examine is the SkyBox Gradient Wipe.
This transition uses a gradient png image to create a window between Shot A and Shot B. There is a default gradient that comes up when you apply the transition, but there are five gradients available for you to choose from. You can also create your own gradients and use them.
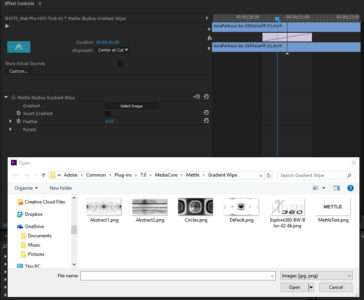
SkyBox offers custom adjustments for Feathering and Rotating the gradient. Since all of these adjustments are keyframable, you can animate the gradient anyway that you’d like to.
Random Blocks

Random Blocks is just that. It creates portals between two shots with random blocks scattered across the screen.
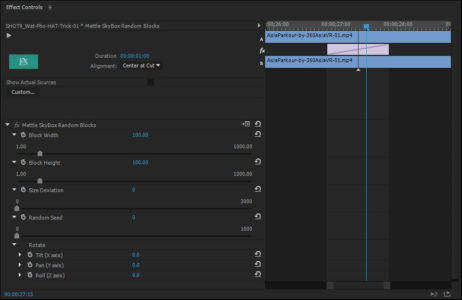
With Random Blocks you can adjust the Block Width, the Block Height, the Size Deviation, the Random Seed amount, as well as the rotation on the X, Y, And Z axis.
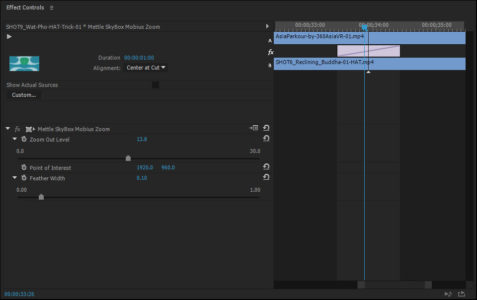
Mobius Zoom
A Mobius strip is a one-sided close surface. It could also be thought of like a twisted cylinder. In this case the Mobius zoom, which is my favorite 360 Transition, it’s kind of a time/space transport from one scene to another.
The effect warps Shot A to Shot B as it takes you through a worm-hole type of look.
It’s a fantastic transition but like any effect that you use in your videos, don’t overuse it.
To enhance your creativity on this effect, you can adjust the Zoom Out Level, the Point of Interest, and the Feather Width.
These are the four 360 VR SkyBox Transitions that you can utilize. There are a couple more that you can create if you are inventive.
SkyBox Glow
The SkyBox Glow is an effect that can be used as a transition.
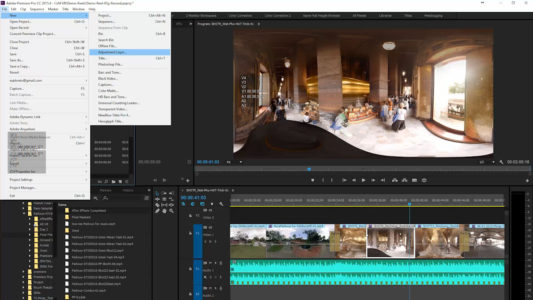
To start, create an adjustment layer and place it over the two clips on your timeline. Add the SkyBox Glow effect, then add keyframes at the beginning, two keyframe points where you want the maximum effect and one more keyframe at the end.

Set the beginning and end keyframes at Zero and the two center keyframes at 100%. As you see, the transition takes us from Shot 1 with no Glow to Full Glow at the center between the two shots and then back to Zero Glow with the second shot.
The SkyBox Blur
The same procedure is used to create a SkyBox Blur transition using SkyBox VR Tools.
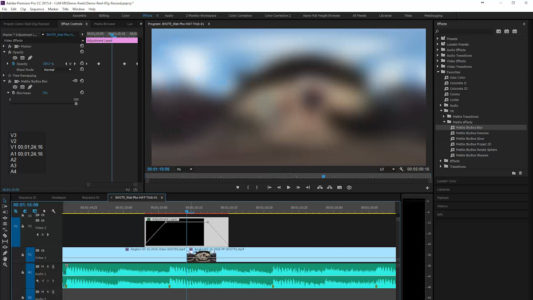
The images show the step by step process.
In upcoming stories, I will show you some of the fantastic things that you can do with the other Mettle SkyBox tools. Thanks to Nancy Eperjesy and Chris Bobotis of Mettle for their help with this story.